To add some flair and make your golf cart stand out, installing an underglow light kit is a fantastic idea. This step-by-step guide will show you how to illuminate your ride with style and safety.
Materials You’ll Need:
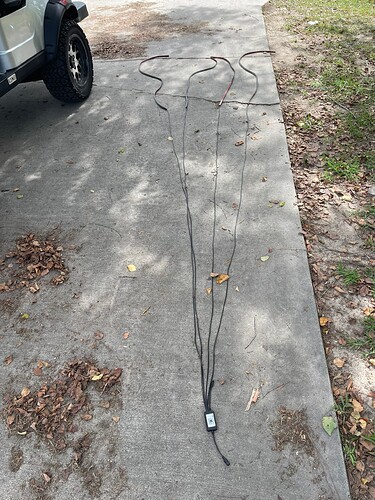
- Underglow light kit - Kruiser 6P (2x120cm & 2x150m)
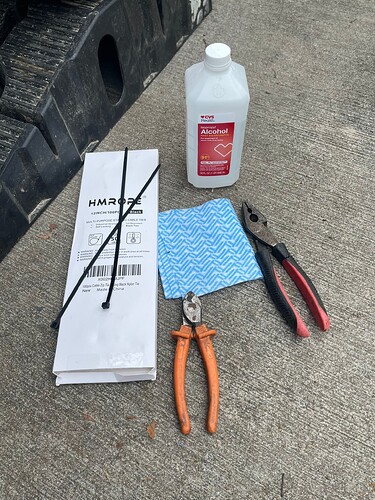
- 12" Zip ties
- Wire Loom 3/8"
- Electrical tape
- Isopropyl Alcohol
- Diagnoal Cutters and Pliars
- Shop Towels or Rag
Optional:
Step 1: Undercarriage Access
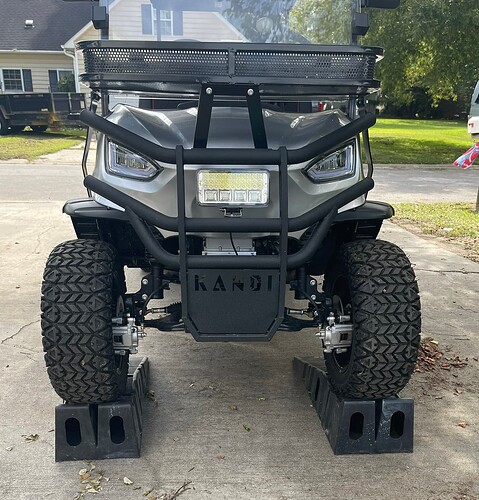
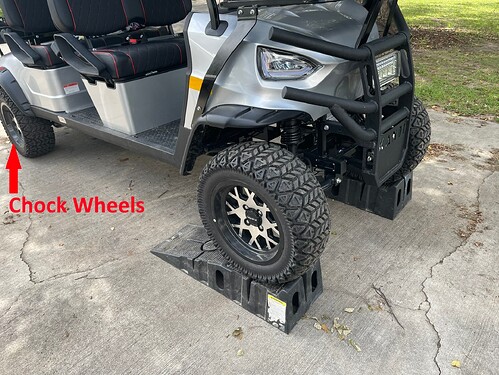
To begin, elevate the car using ramps or a jack and jackstands in order to gain improved access beneath the vehicle.
For safety purposes, make sure to use wheel chocks to prevent any rolling of the wheels.
Step 2: Plan Your Wiring Route
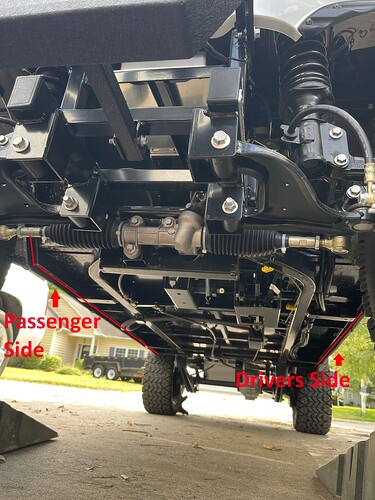
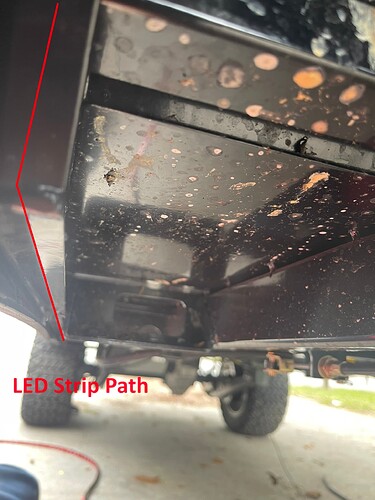
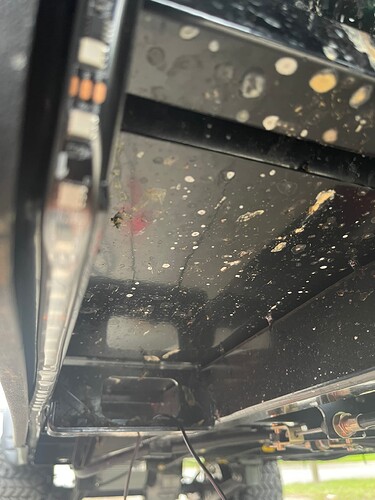
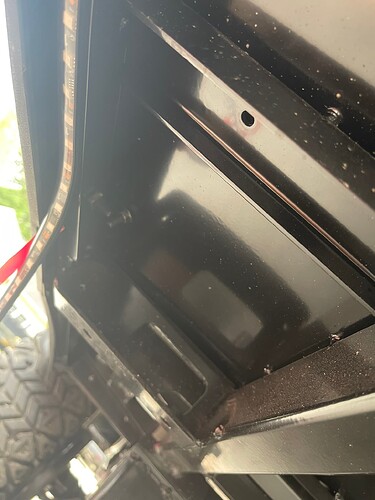
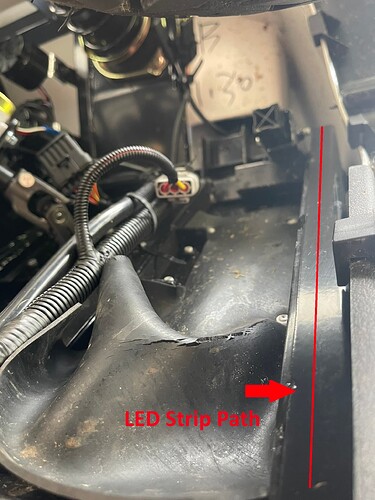
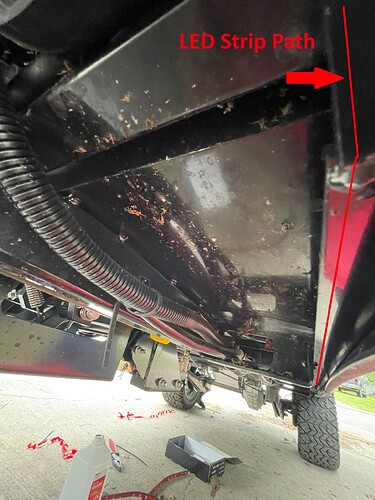
We followed the wire path along the frame rail that runs closest to the sides of the vehicle. You can trace this rail all the way into the front and rear wheel wells
Step 3: Prepare the Surface
Before peeling off the protective film, lay out the light strips and create a wire-routing plan. Afterward, clean the rail initially with a damp rag, and once it has dried, go ahead and clean it again using Isopropyl Alcohol.
Note: Applying 3M tape primer is optional.
Step 4: Remove the Dashboard
Remove the dashboard by following this guide.
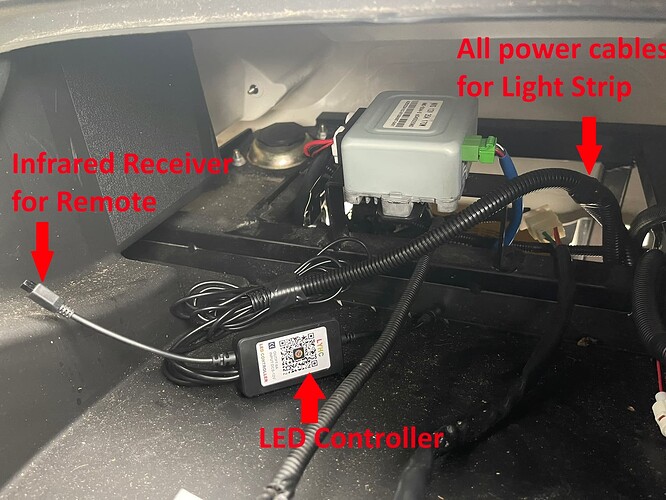
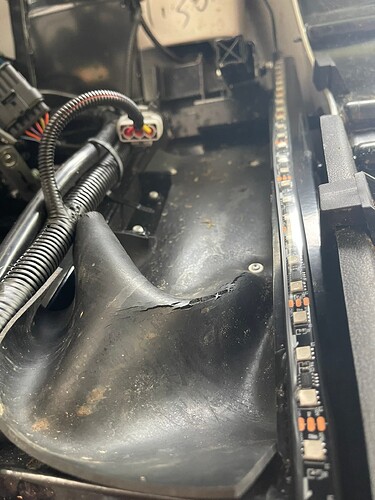
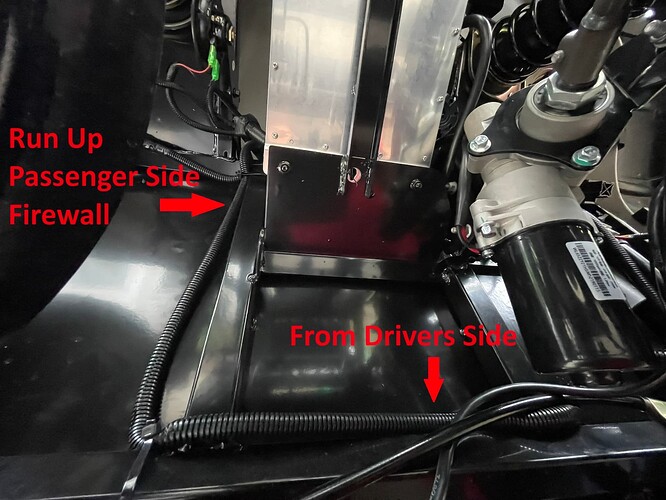
While keeping the LED controller in the dashboard, run all of the light strips down the passenger side of the firewall.
Step 5: Peel and Stick
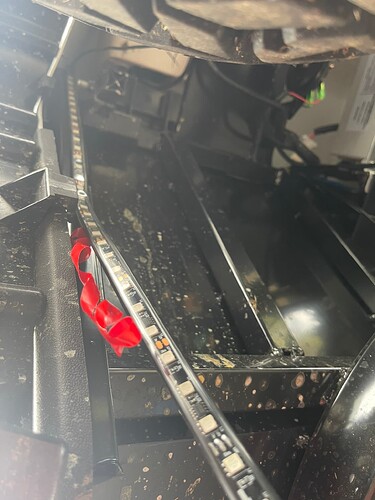
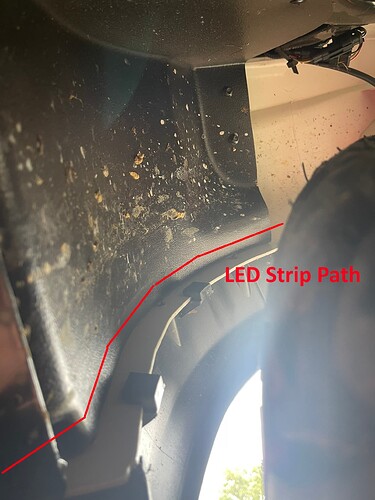
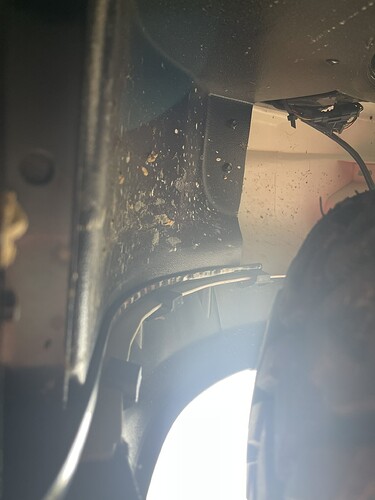
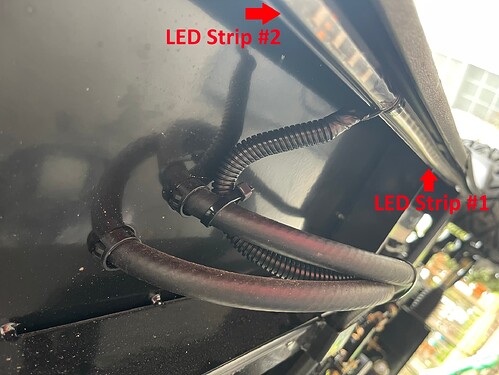
Begin by peeling the film from the end with the power lead, starting in the front passenger wheel well. Initiate this process at the uppermost section of the side frame rail, then run the light strip downward.
Once you reach the bottom of the wheel well, follow the curve to seamlessly continue running the light strip along the side rail.
Step 6: Continue the Run
Keep extending the light strip all the way to the end of the undercarriage frame rail.
Step 7: Follow the Rear Bend
Follow the curve upward along the rear wheel well and affix the light strip to the inner well.
Step 8: Routing Power on the Undercarriage
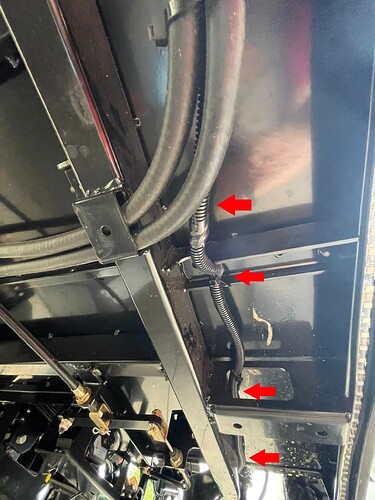
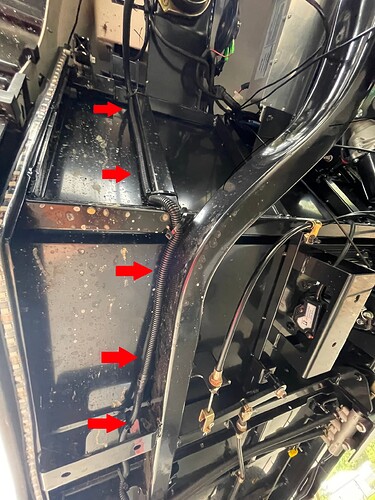
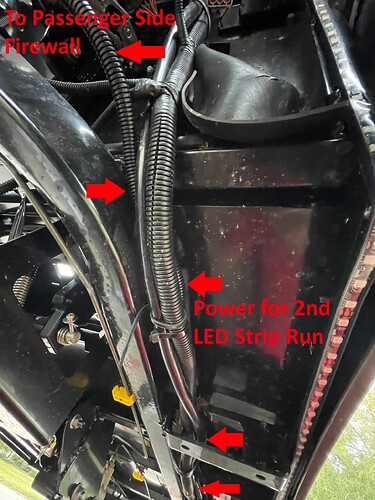
In the case of the Kruiser 6P, the first light strip ended at the brake line hoses. Utilizing wire loom, zip ties, and electrical tape, make certain that the power line is securely attached and adequately protected to prevent any rubbing, ensuring its long-lasting durability.
Guide and secure the power connection as it travels towards the front of the vehicle.
Step 9: Routing Power Up the Firewall
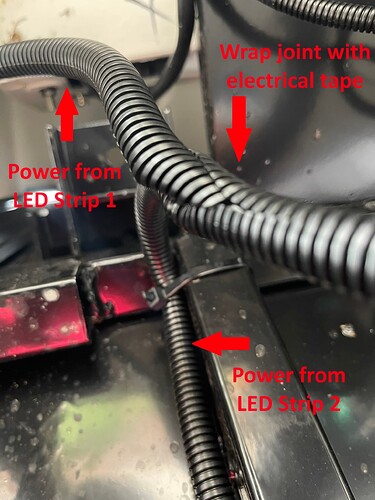
Continue to run the power line, safeguarded within wire loom, from the undercarriage all the way up to the top of the firewall, securing it in place with zip ties.
Step 10: Prepare the Drivers Side
Before peeling off the protective film, lay out the remaining light strips and create a wire-routing plan. Afterward, clean the rail initially with a damp rag, and once it has dried, go ahead and clean it again using Isopropyl Alcohol.
Note: Applying 3M tape primer is optional.
Step 11: Peel and Stick Drivers Side
Begin by peeling the film from the end with the power lead, starting in the front drivers sidewheel well. Initiate this process at the uppermost section of the side frame rail, then run the light strip downward.
Once you reach the bottom of the wheel well, follow the curve to seamlessly continue running the light strip along the side rail.
Step 12: Routing Power on the Firewall
Route the power cable from the driver’s side light strips up along the passenger side firewall. All power cables will enter behind the dashboard, ensuring convenient access.
Step 13. Preparing for Permanent Installation
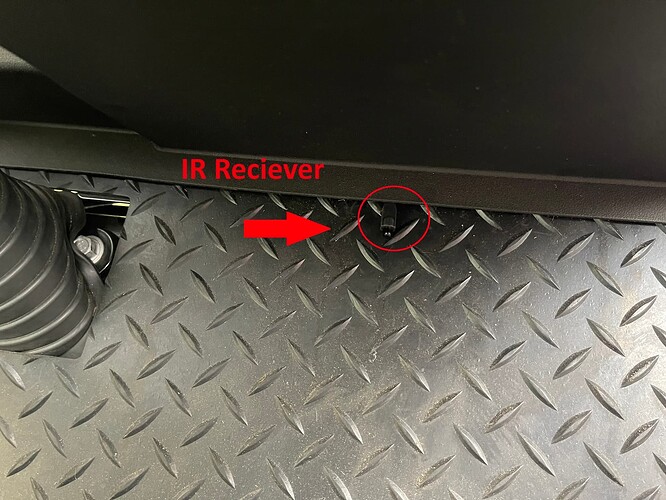
The power strip cables will be directed over the passenger side firewall and then routed under the dashboard. You may want to contemplate using Velcro to affix the LED controller to the underside of the dashboard to prevent it from shifting while driving. It’s important to note that the LED Light Strip featured in this guide includes a remote and an IR receiver that must remain visible externally for proper functionality.
Carefully tuck the IR receiver under the bottom of the dashboard, ensuring it’s positioned on the opposite side to guarantee the remote control can effectively operate the LED controller.
Step 14: Connect the Wiring
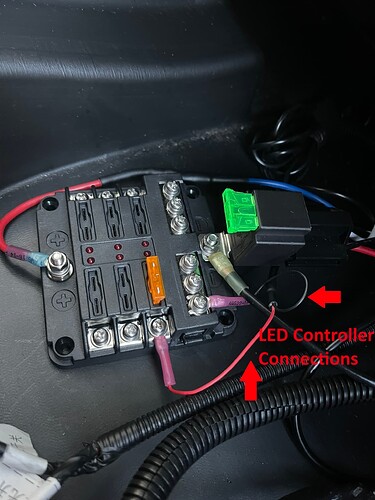
Establish the connection of the LED wiring to a 12-volt power source, with the USB 12-volt connection being the most commonly utilized power supply.
We’re currently working on a future post that will detail how to wire a fuse box using the USB as the 12-volt source, along with instructions on how to utilize the running lights to activate the lights. Stay tuned for that!
Step 15: Enjoy the Glow
With your underglow lights successfully installed and tested, it’s time to enjoy the transformation of your golf cart. Whether you’re cruising through your neighborhood or camping with friends, your golf cart will now be the center of attention, not to mention safer in low-light conditions.
Conclusion
Installing an underglow light kit on your golf cart is a fantastic way to enhance its appearance and visibility. By following these steps and taking your time to do the job correctly, you can illuminate your ride with style and safety. So, gear up, get your tools ready, and let your golf cart shine!
